How to convert and play videos for Panasonic TV Viera AVCHD and SD VIDEO formats
This guide how to make AVCHD and SD VIDEO formats to playback with Panasonic LCD & Plasma TV with Viera Image Viewer internal player
These free tools will be needed to download and install for our task:
1. multiAVCHD
Download multiAVCHD
2. Avisynth
Avisynth
3. DGMPGDec (DGIndex) - for SD VIDEO Creation Only
DGMPGDec (DGIndex)
4. ImagoMPEG-Muxer - for SD VIDEO Creation Only
ImagoMPEG-Muxer
5. MuxMan - for SD VIDEO Creation Only
Muxman
6. Join VOB Files Tool - for SD VIDEO Creation Only
Join VOB Files Tool
For AVCHD conversion we will use - Panasonic TX-LR42 U20 LCD TV (European model), Transcend SDHC 16GB Class 10 Card, Transcend RDP7 SDHC Card Reader/Writer, Transcend JetFlash 600 16 GB USB Flash as hardware and 700MB "TEST.MKV" File with 1920*800 movie (10 min length sample).
For SD VIDEO conversion (remuxing) we will use Transcend JetFlash 600 16 GB USB Flash and PAL VIDEO_TS folder with movie
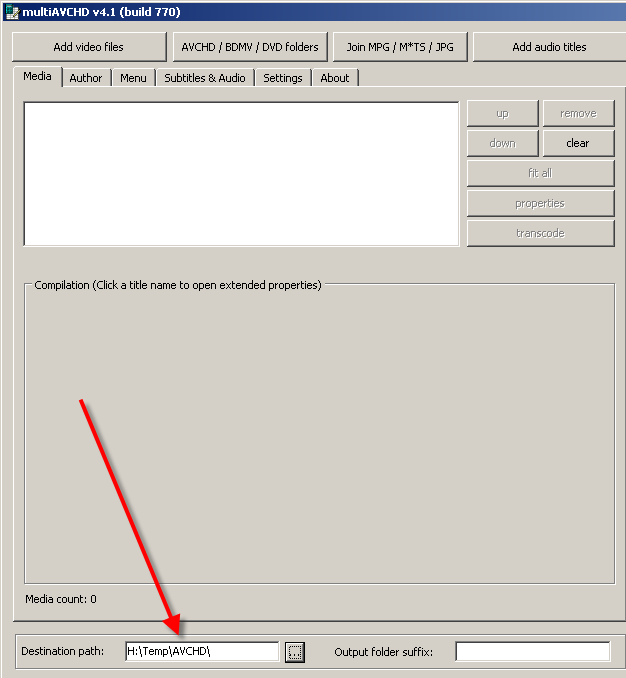
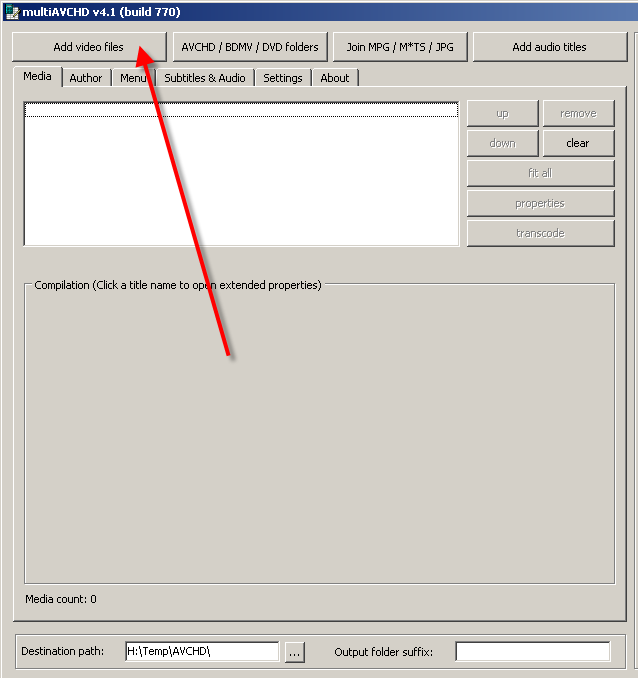
1. Change "Destination Path" to the disk with large amount of free GBytes
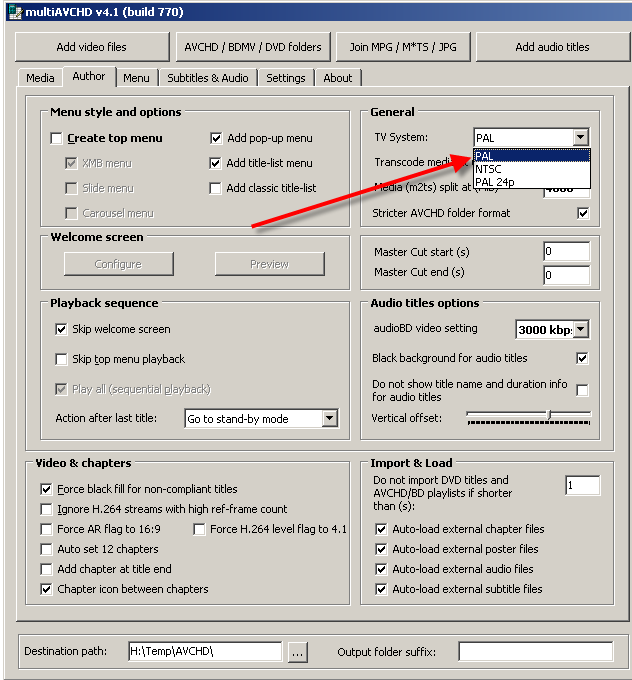
2. Change "TV System" to PAL if your Panasonic TV is PAL based model or to NTSC on "Author" Tab
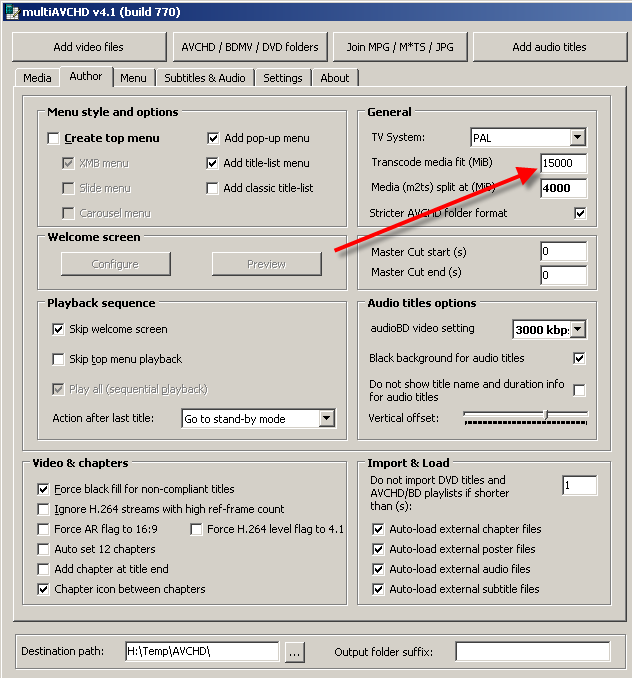
3. Set "Transcode media fit (MiB)" to free space available on your SD card or USB Flash, in our case it will be 15000 = 15000*1048576 = 15728640000 bytes. Note: it is not the maximum capacity for 16GB SD Card/USB Flash, it is the decreased value.
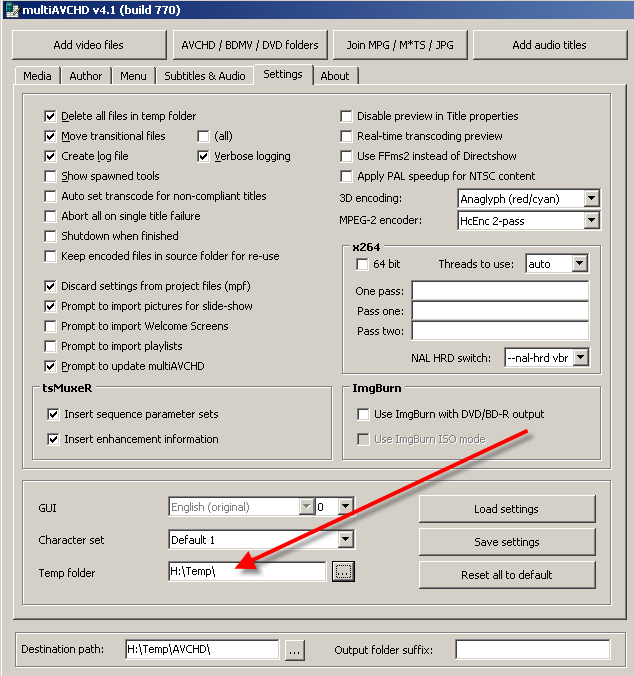
4. Change "Temp folder" on "Settings" Tab with enough free space
5. Add media file (TEST.MKV) to multiAVCHD. If your MKV file will be recognized as muxed with incompatible version of MKVMerge, multiAVCHD will ask you to remux again your TEST.MKV file to the compatible. It is better to agree with this operation - it will make remuxed copy in a few minutes.
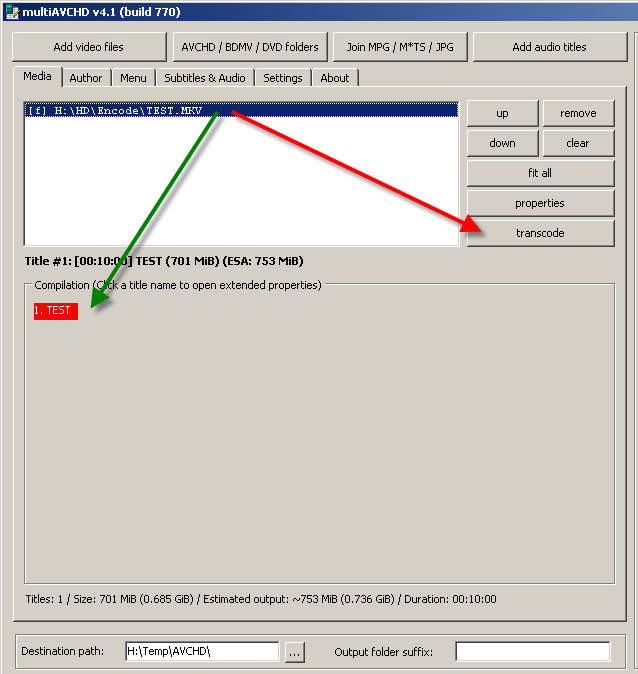
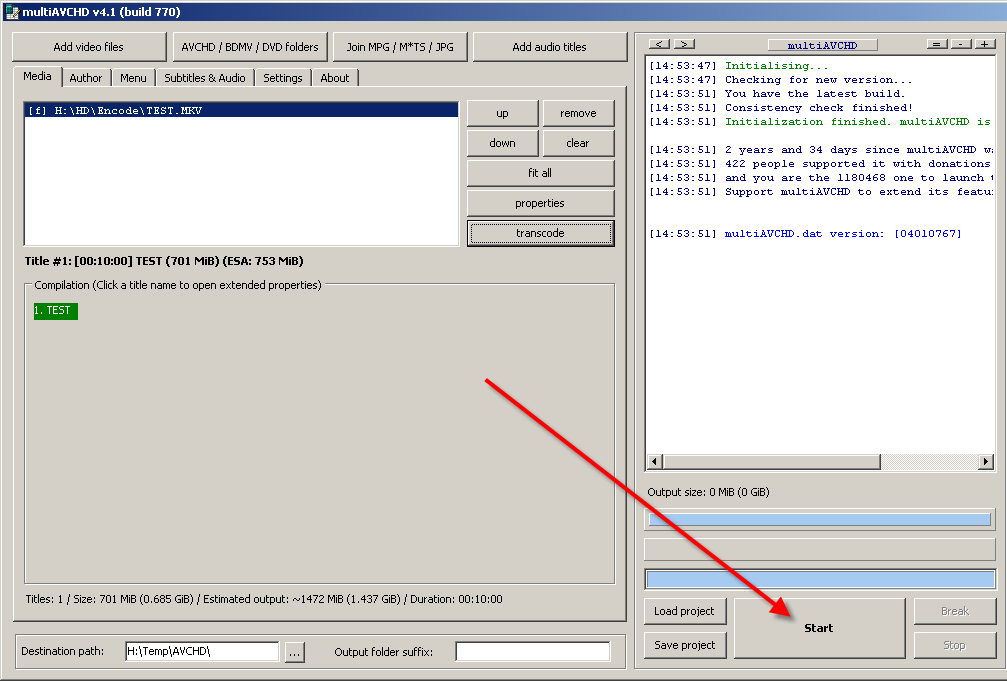
6. multiAVCHD will scan our TEST.MKV file and shows (green arrow) incompatibility with AVCHD standards. Please select TEST.MKV file in the list and press "transcode" button (shown with red arrow)
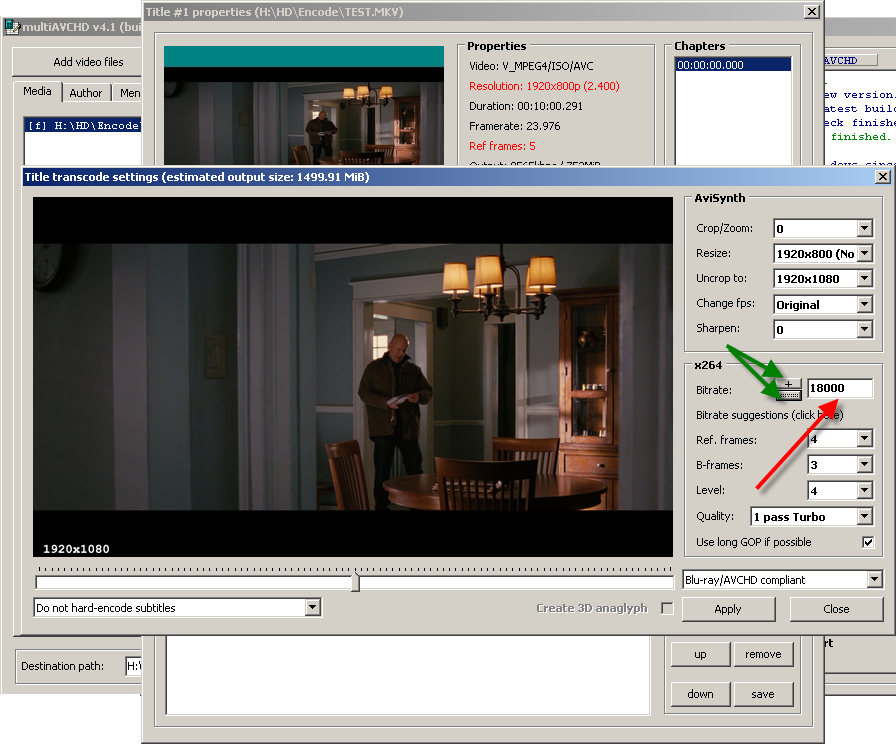
7. multiAVCHD will open two windows, and the "Title transcode settings" window will be active. Please change the X264 bitrate (up to 24000 (KBits) will be compatible with Panasonic AVCHD mode), the estimated output size will be displayed/changed by pressing "+/-" buttons (green arrows). Note: for 90 min movie with 1 AC3 448kbit audio track for 16 GB SD card the maximum bitrate is about 21500, for 120 min movie maximum bitrate is about 16000, for 150 min movie - 12500. You can leave default "1 pass Turbo" Quality preset as shown, or select 1pass/2pass presets for X264 transcoding, depending of your PC processor speed. After all settings will be done - press "Apply" button.
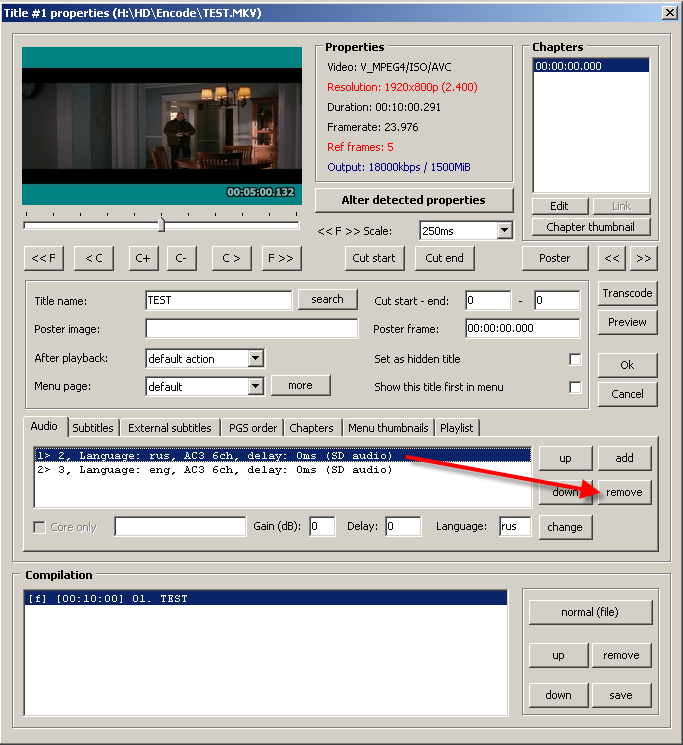
8. Now we can remove additional audio tracks from MKV file, then press "OK" button
9. multiAVCHD is ready - press "Start" button to select output mode
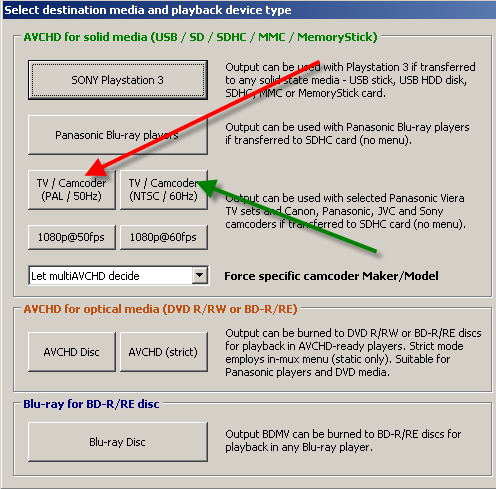
10. Now, please select your TV set main standard TV System - because Panasonic limits AVCHD playback to the single standard, or PAL only, or NTSC, select the TV standard of your TV. Our TV is a PAL, so we need to press to "TV/Camcorder PAL/50Hz" button (red arrow), for NTSC Panasonic Viera TV please press "TV/Camcorder NTSC/60Hz" button (green arrow). In case of wrong selection of TV standard multiAVCHD will transcode the incompatible AVCHD folder structure for your Panasonic TV model. Only expensive Hi-End Panasonic TV models support both PAL and NTSC AVCHD playback.
11. Transcoding will begin. multiAVCHD will convert 23,976 (NTSC) to 25fps (PAL) video and speed up AC3 audio to get sync with video. X264 encoding is high CPU load process, for Pentium Dual Core E5300 1 minute of the video will need 2 minutes of CPU time in 1pass Turbo mode, so be patient. 2pass conversion will increase the transcoding time twice. After the conversion multiAVCHD will report at log window that resulting AVCHD must be copied to PRIVATE folder from the ROOT of the SD card/USB Flash. The File system for SD/SDHC card must be FAT32, FAT32/exFAT for new SDXC card
If you have VOB, MPG files as from DVD, camcorder, DVD compatible files with your Panasonic TV standard (PAL or NTSC), and their file's size not exceed 4GByte limitation, you do not need to make splitting at all, so you can go to Step 9.
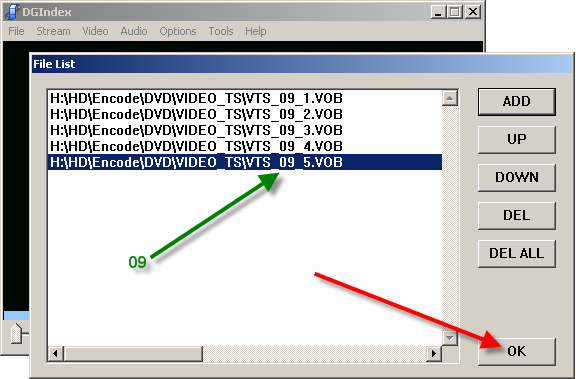
1. Start DGIndex and select all VOB files from the largest TITLE SETs, it could be with any number, in our case this number is "09". Please, add all VOB files with increasing numbers, as shown. Note: in our case, the source VOB files are from DVD-5 disc with 5 files, if you have DVD-9 disc, there are could be 5,6,7,8 VOB files. Please order input VOB files correctly and then press "OK" button
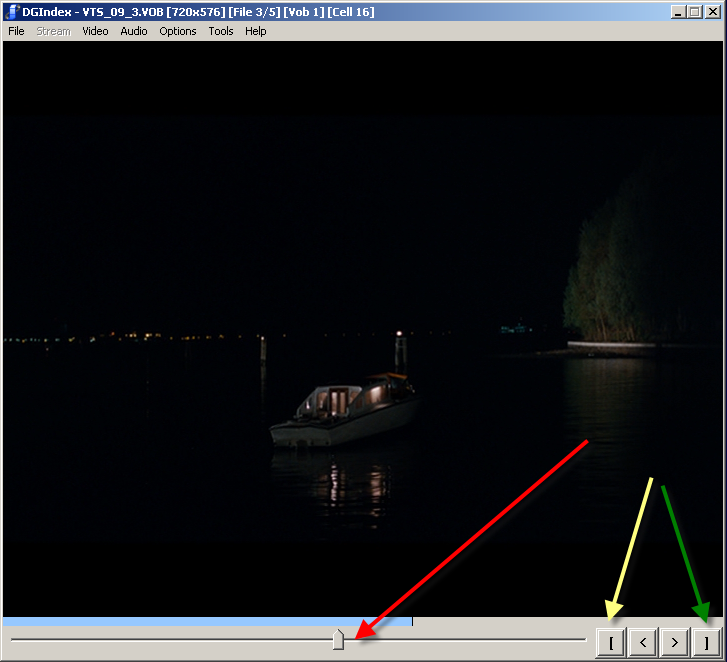
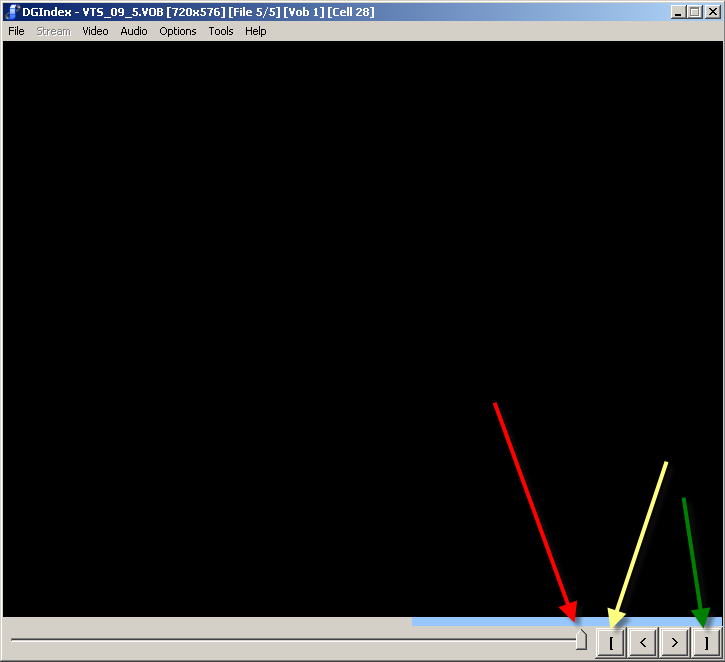
2. Now, we need to set split point for the movie - it is better to use silent scene change, so use mouse to set split point (shown with red arrow), to correct split point use "Left" and "Right" keys on the keyboard, then move regulator to the start of the movie, and press "[" button (yellow arrow) and the split point must be marked with "]" button (green arrow).
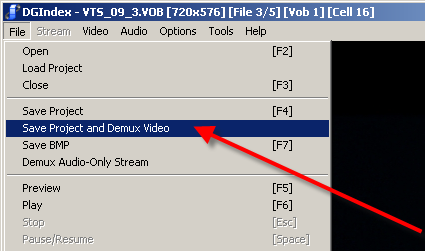
3. Marks are set, now we can demultiplex to elementary streams our part #1 of the movie. Please check in Audio menu - Output Method - Demux All Tracks

4. Select File - Save Project and Demux Video, the select "Part1" file name and output folder for "d2v" project, press "Save" button. In a few minutes DGIndex creates files with elementary streams - "Part1.demuxed.m2v" and "Part 1 ... ms.ac3" audio track(s). These are elementary streams for Part1 of the movie.
5. Now we need to set marks for Part2, so we use the same buttons, as used at Step 2. Please select marks position correctly with "Left" and "Right" keys, regulator movement (shown with red arrow) with mouse could jump between too many frames. Then, go to the File menu - Save Project and Demux Video, select "Part2" file name for output. In a few minutes new group of files "Part2" (elementary streams) will be created by DGIndex.
6. All elementary streams for "Part1" and "Part2" are ready, please define, what audio tracks are suitable for you (non-foreign language), in most cases "T80" is the code of the first audio stream in your language. If for the "Part2" audio track DGIndex created file name like "Part2 T80 3_2ch 384Kbps DELAY -200ms.ac3" (visible non-zero (+ 200-300 ms) audio delay between audio and video streams for Part2), go to Step 7. For small audio delays you can do the same mux operations as for Part1 and Part2.
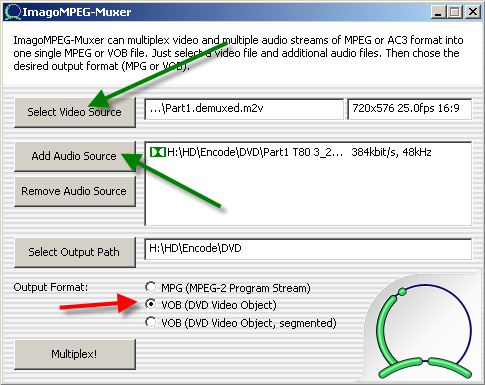
In most cases, for Part1 there is no any audio delay, so run ImagoMPEG-Muxer, add Video "Part1.demuxed.m2v" stream and "Part1 T80 3_2ch 384Kbps DELAY 0ms.ac3" elementary streams (green arrows), check "VOB (DVD Video Object)", then press "Multiplex!" button. In a few minutes "Part1.demuxed.vob" file will be done.
For the Part2, if the delay length is not critical, or you are agree to ignore it, please do the same operations for the "Part2" elementary streams.
Note: please check the final "Part1.demuxed.vob" and "Part2.demuxed.vob" file's size, it must be lower than 4GB, it is could be actual for splitting of DVD-9 Title Sets, in this case you will be needed to change split point to earlier at Step 2.
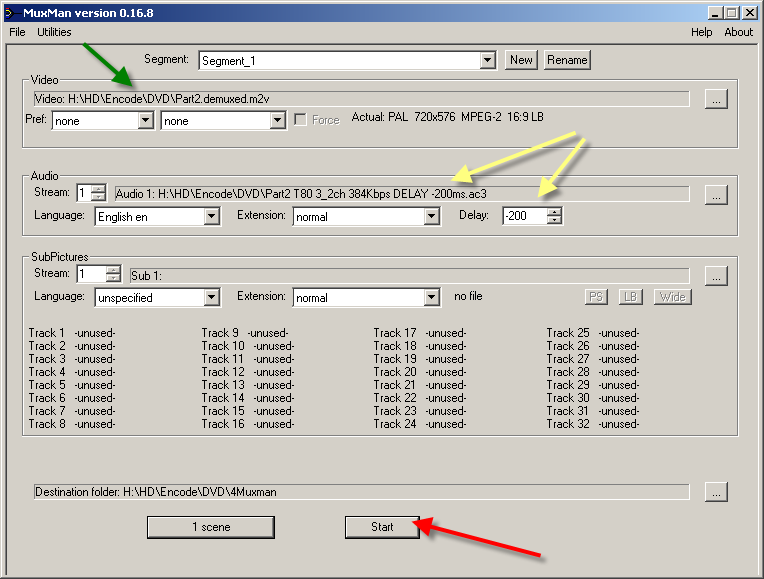
7. For "Part2" elementary streams with Delay (-200 ms in our case), you need to run MuxMan and author new VIDEO_TS structure with "Part2" elementary streams changing detected audio delay. Please add Video stream (green arrow), add Audio stream and set "Delay:" to "-200" ms (yellow arrows), select "Destination folder:", press "Start" button. Muxman will ask about "VIDEO_TS" folder creation, press "OK".
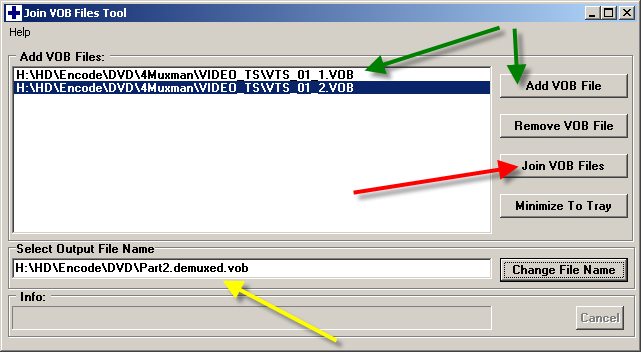
8. After the authoring process, we will get segmented VOB files in "4Muxman/VIDEO_TS" folder:
VTS_01_1.VOB
VTS_01_2.VOB
or even
VTS_01_3.VOB
and
VTS_01_4.VOB
All these segmented VOB files must be joined with Join VOB Files Tool - add all VOB files by increasing names (green arrows), select the output file name to the "Part2.demuxed.vob" (yellow arrow), then press "Join VOB Files" button (red arrow).
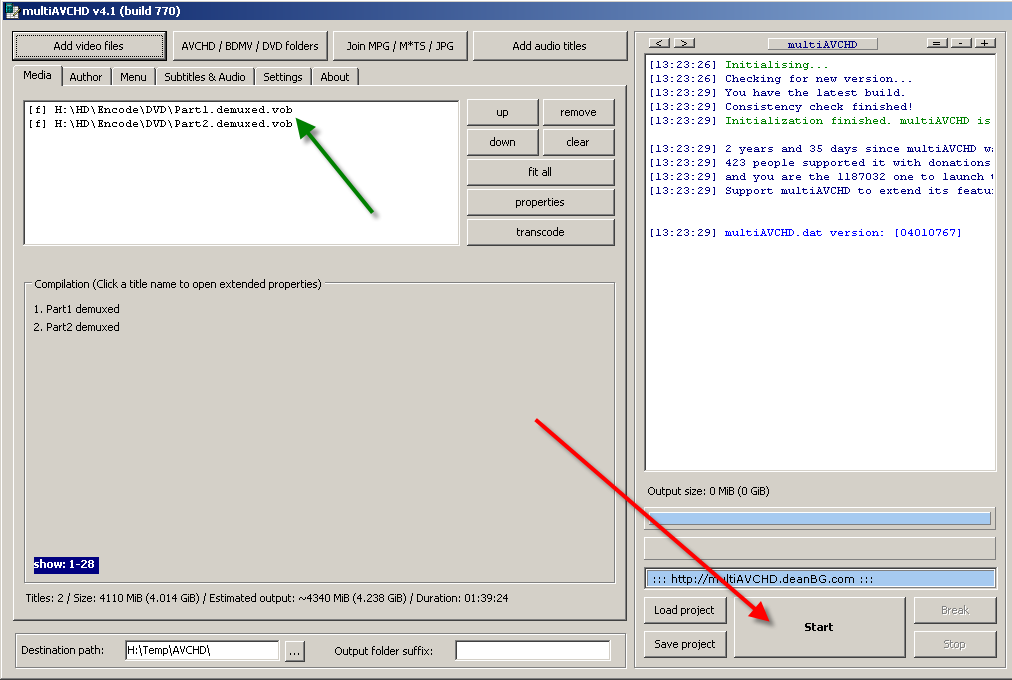
9. All VOB files are ready to mux them to SD VIDEO. Run multiAVCHD, press "Add video files" button, select "Part1.demuxed.vob" and "Part2.demuxed.vob", these files will appear in listing (green arrow), the press "Start" button (red arrow).
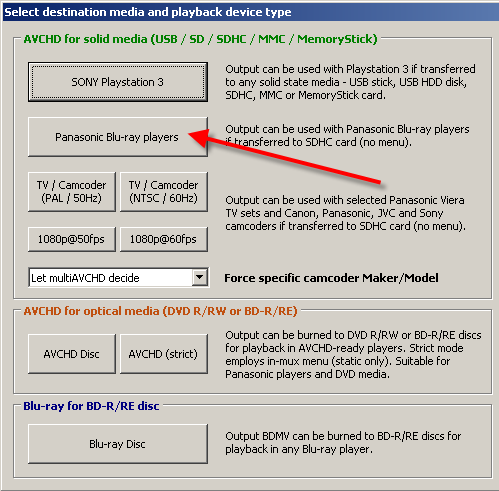
10. Press "Panasonic Blu-ray player" button to start remuxing to SD VIDEO structure with multiAVCHD. In a few minutes SD_VIDEO folder will be created, you need only to copy SD_VIDEO folder to the ROOT of SD/SDHC card or USB Flash, which must be formatted as FAT32.
To contact to the author of this guide, please send e-mail:
Aleksandr Ignatov